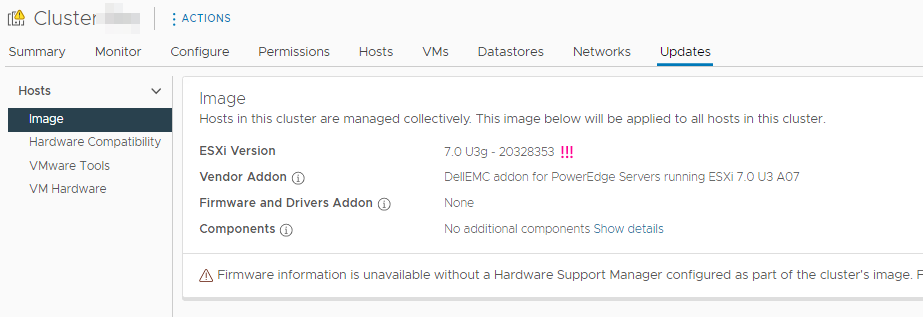
A few days back i had the challenge to convert a vSphere 7.0 U3 Cluster (which was still managed in Lifecylce Manager with Baselines –> which are finally going away after vSphere 8, btw., so it’s time to migrate, folks!) to a Single Image.
I’m not going into details about vSphere Lifecycle Manager with Single Image and/or Baselines here, there’s lot’s of other stuff to read about that on the internet.
The challenge here was that the vCenter had no connection to the internet, so all the benefits like giving me a long list of ESXi releases and Vendor Add-Ons was not the case, and I couldn’t find any advice in the documentation on how to do it “offline” and seperated from the World Wide Web.
So, let me show you how I did it.
Conversion – First Try
First step was to select the cluster in my vCenter UI, navigate to the Updates tab and choose “Manage with a Single Image”…
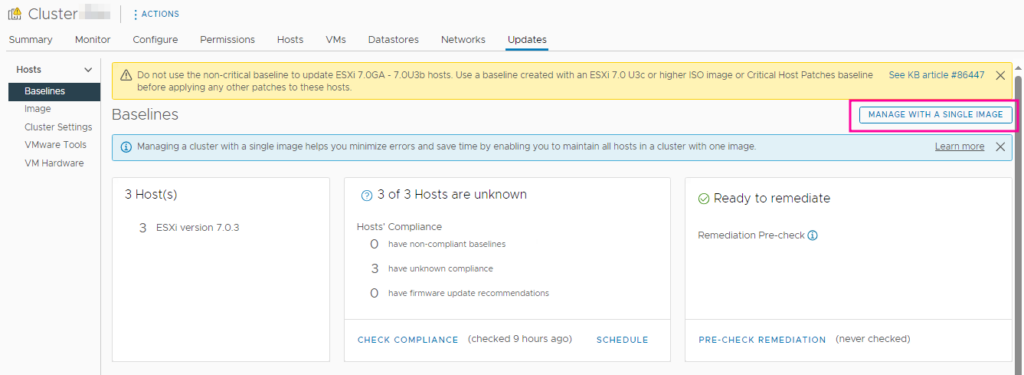
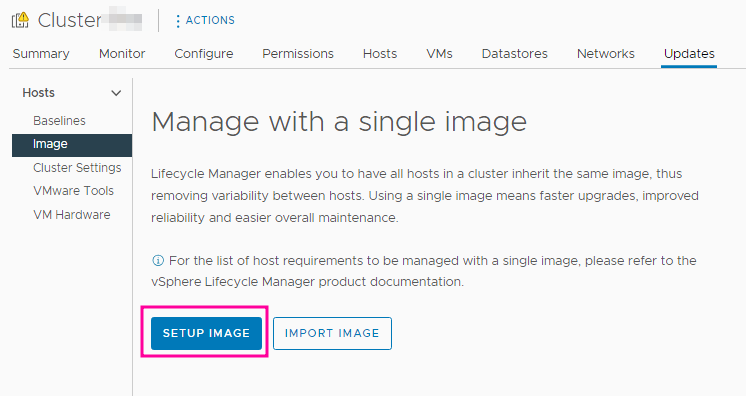
…and hit “Setup Image”
But oh no, the list for the ESXi releases is empty 😥
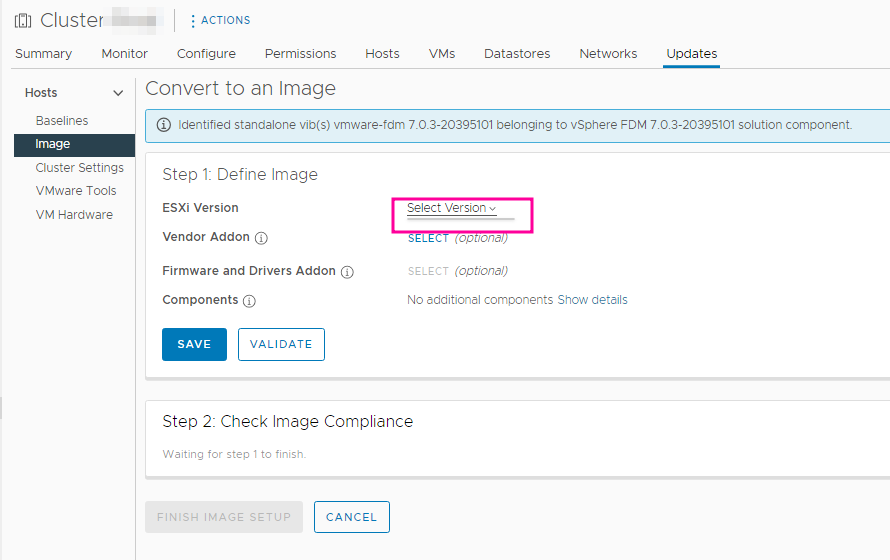
Usually, this list would be filled with Information received via the World Wide Web with all the nice ESXi versions we know and love, including the current version of my ESXi Hosts.
I would then have simply chosen my current ESXi version and created an image from that…
…but unfortunately this is not possible in an air-gapped environment. 🙁
Download the necessary files
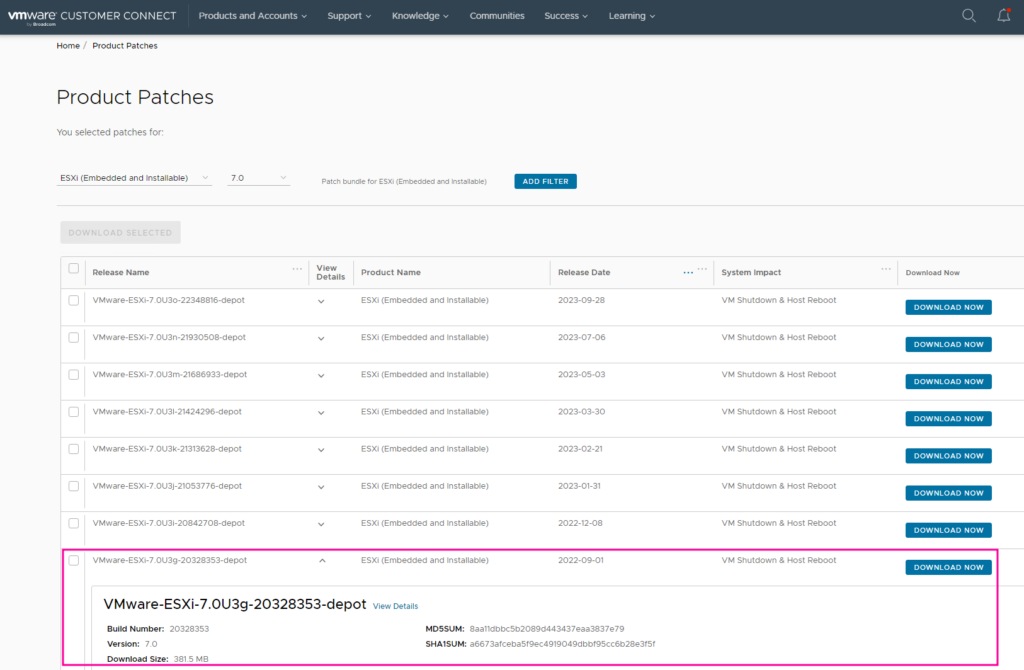
The next step is to download this version on our own, so let’s got to VMware Customer Connect and login.
Then go to Products and Accounts >> Product Patches

Choose “ESXi” and the main version you need (in my case it is 7.0) and hit Search and it will come up with all available patches in a zipped format.
The version I was looking for was 7.0U3g and yeah, there it is. Download the “…depot.zip”.
(You could also already go on and download the version you want to go for as a next step.)
Get the files into Lifecycle Manager
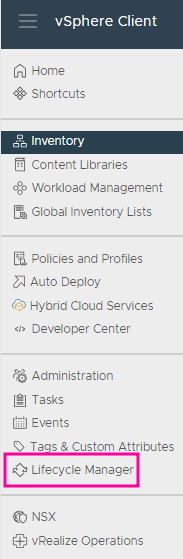
Back to the vSphere Client, jump to the Lifecycle Manager again
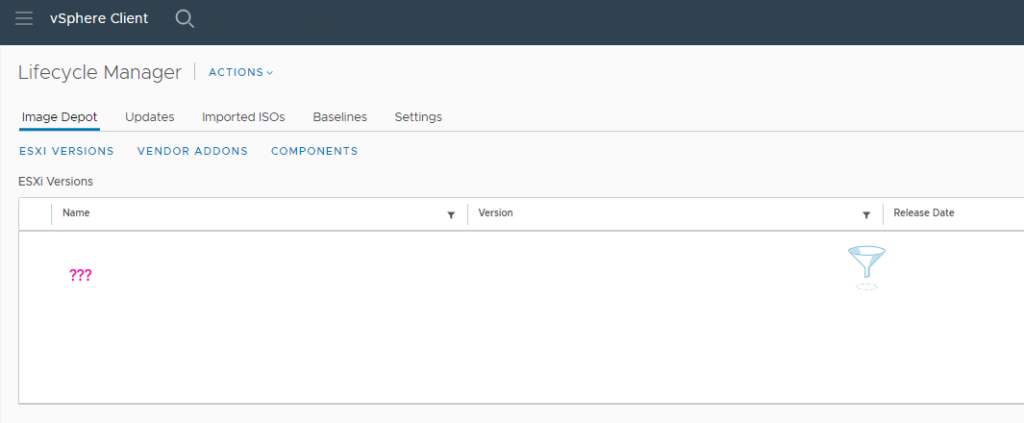
Nothing in ther Image Depot yet, so far so good
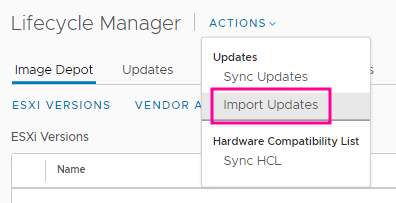
Next step is to import the downloaded depot.zip into Lifecycle Manager.
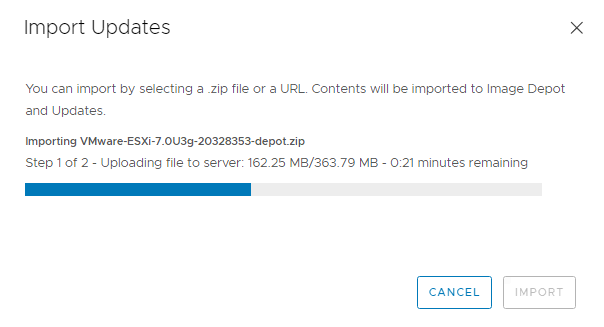
Go to “Actions >> Import Updates” to do that, chose the depot.zip file and hit “Import”.
This is how it looks during import:
Afterwards, the ESXi version we just imported will show in the Image Depot
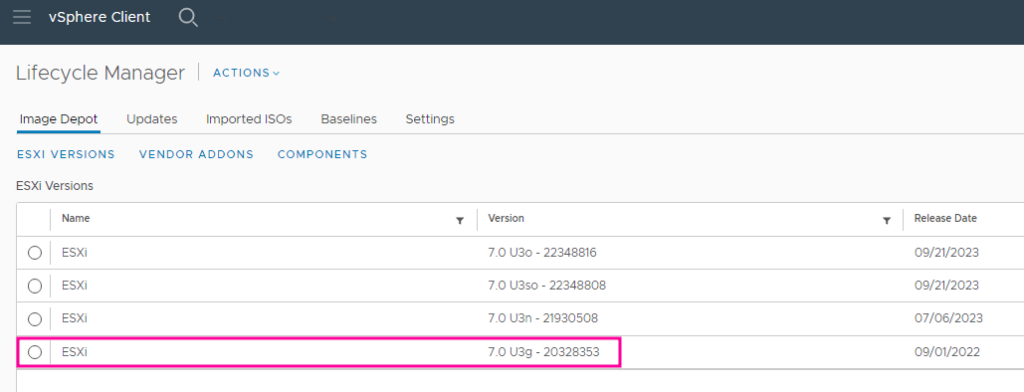
As you can see, I also already imported the versions I (might) want to go to after I converted my cluster to “Image based”.
Conversion – Next Try
Back to my Cluster, navigate to the Updates tab and again, choose “Manage with a single image” and “Setup Image”.
Nice, all my imported Updates now show up in the list to choose from. 👍
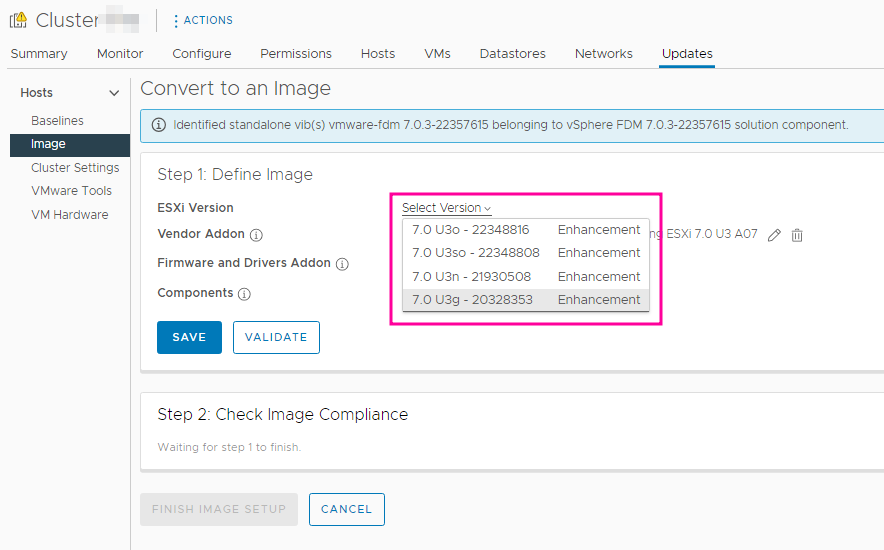
I choose my current version, click save and successfully converted my cluster to “Image Based Lifecycle Management” 🎉